# Assets
# Units/Areas (With Brochure PDF/Image and Appliances Information)
Information about the available units, such as rooms, apartments, or other types of accommodation. This section includes details about unit availability, features, and maintenance status.
Please find attached the video for the **Unit/Areas**.
Please find the attached video for adding information to the **Brochure (PDF)**
****
Please find the attached video for adding information to the **Brochure (Image)**
****
Please find the attached video for adding information to the **Appliances**
****
- **New Unit/Area** - Simply fill out all necessary information fields and click "Submit."
[](https://support.ceonesource.com/uploads/images/gallery/2025-12/QZMCaafTwzKHcg9E-image.png)
- **All Units** - You will find the unit number/unit name, access to view the resident's profile, check the status, and update the unit as needed by clicking the three-dot icon under "Action."
[](https://support.ceonesource.com/uploads/images/gallery/2025-12/umMzNUbVlkk5RdP6-image.png)
# Unit Entry
Serves to outline the access permissions granted to individuals. The purpose of this authorization is to enable selected individuals to carry out assigned tasks or personal matters. May be undertaken in representation of an **Admin/Staff member or Resident/User.**
1. **Admin/Staff member** - This refers to the part of the system or process where **administrators or staff members manage and control the Unit Entry Authorization.** (Creating and approving entry authorization. Editing or deleting existing entries, Managing user permissions and roles, Monitoring Entry Logs and Reports).
Please find attached the video for the **Unit Entry**.
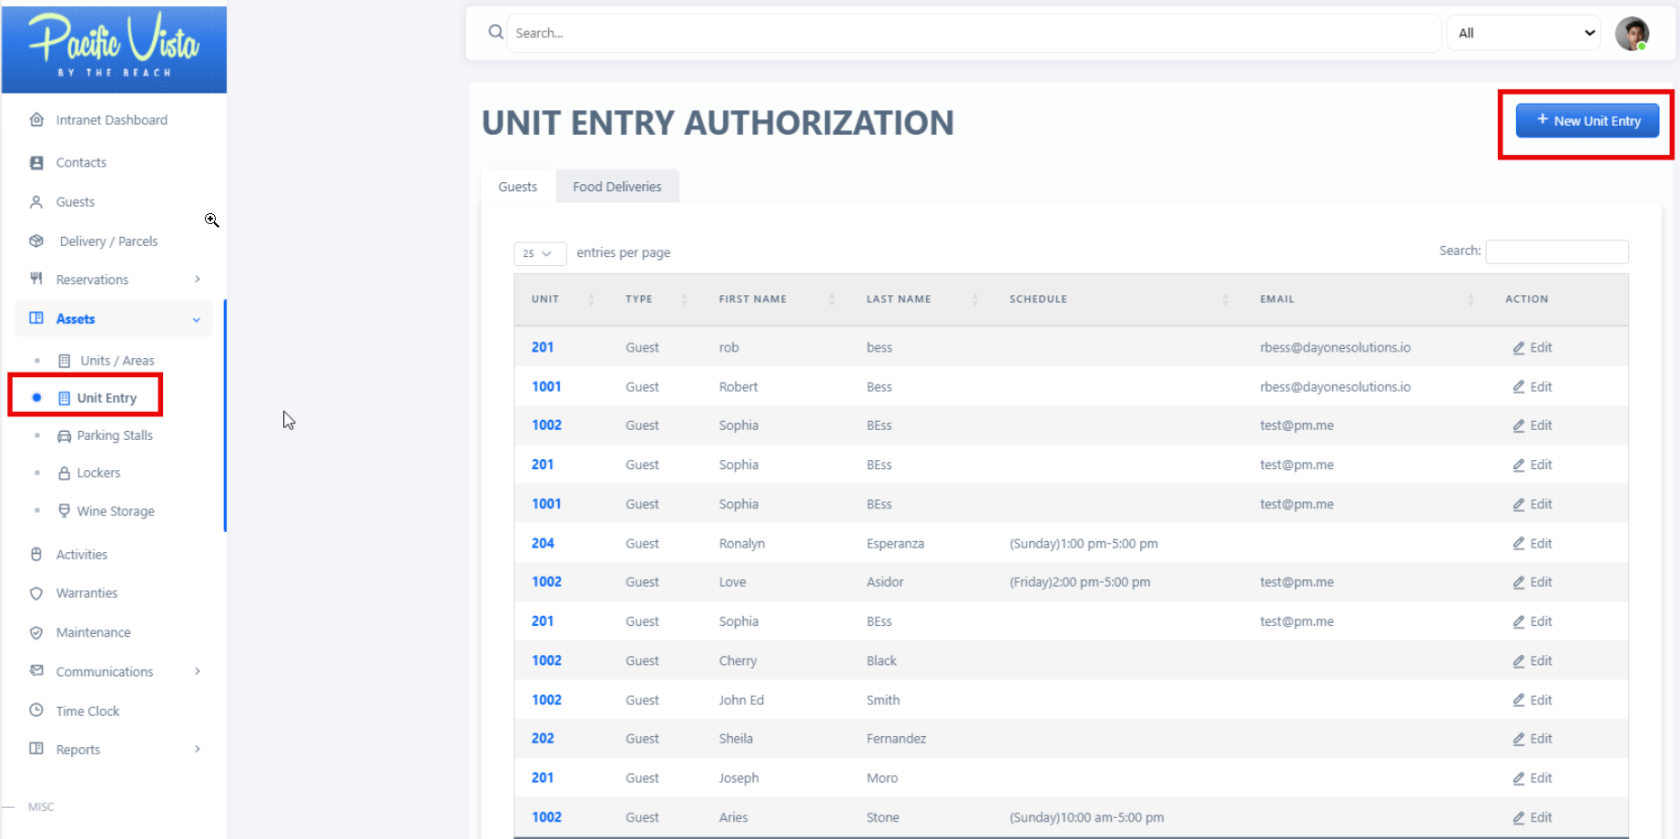
Click on **'Unit Entry**,' click on '**New Unit Entry**' to add or create a new entry.
[](https://support.ceonesource.com/uploads/images/gallery/2025-11/RyGdVQjNzOd2ZBHu-image.png)
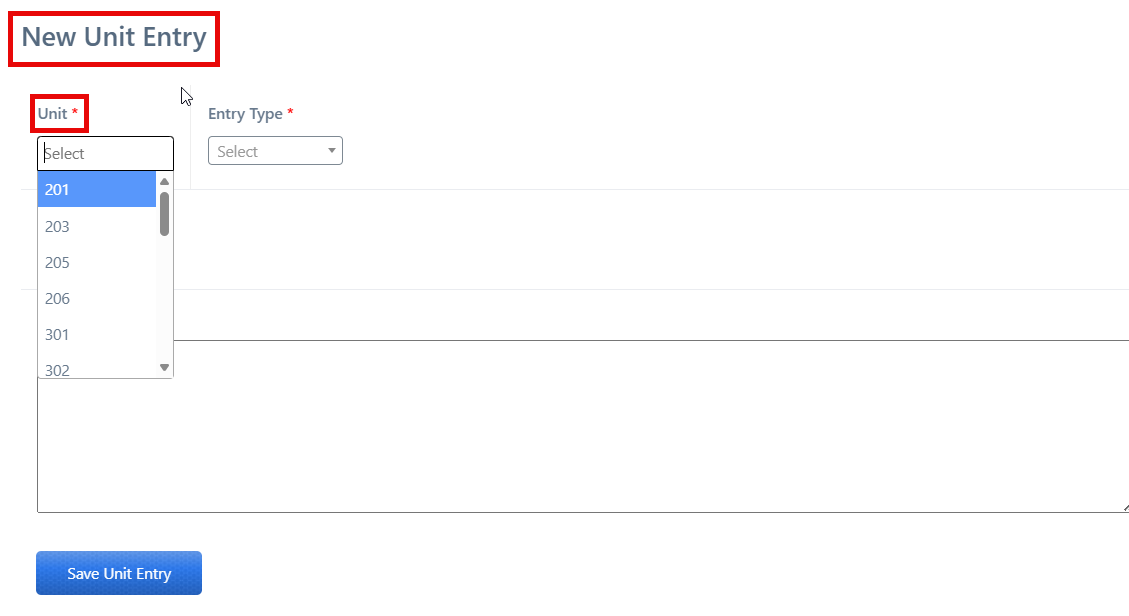
Fill in the required information, such as '**Unit**' (you can either type it in manually or click the dropdown arrow to select from the options).
[](https://support.ceonesource.com/uploads/images/gallery/2025-11/7colc6Lnie3aQJVA-image.png)
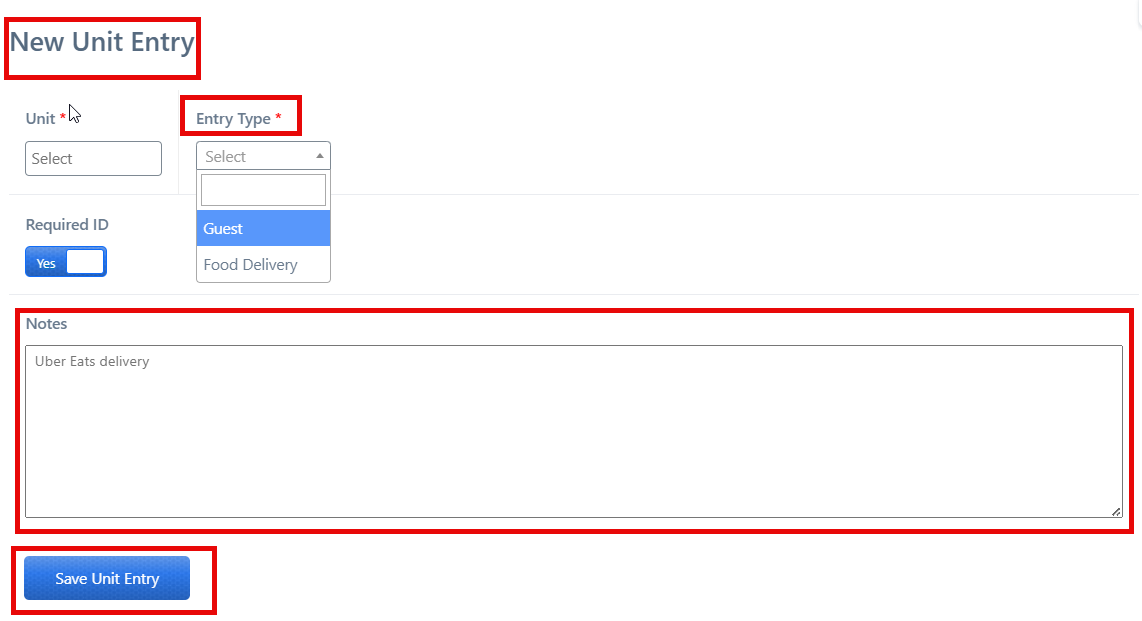
Choose if the authorization is to be made for **'Food Deliveries**' or for a '**Guest**'.
You may add a specific **“Note.”**
Once you have filled in all the necessary details, you may click ****"Save Unit Entry**".**
[](https://support.ceonesource.com/uploads/images/gallery/2025-11/JAMsScenMUvdznew-image.png)
**2. Resident/User** - Residents can request or approve entry authorizations for guests or deliveries related to their unit, Review notifications about incoming guests or deliveries, provide additional instructions or notes for the authorization, ay verify or confirm identities).
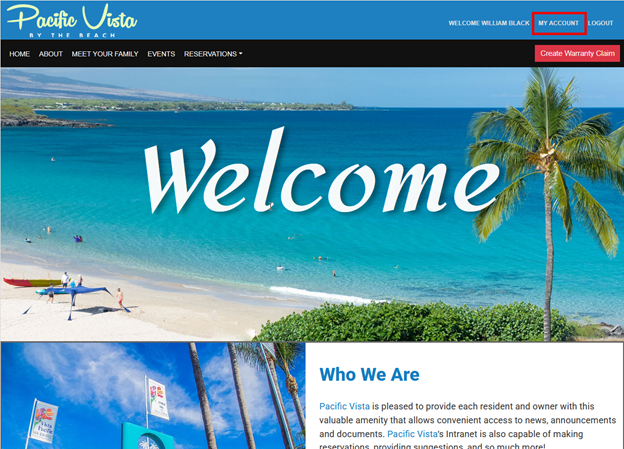
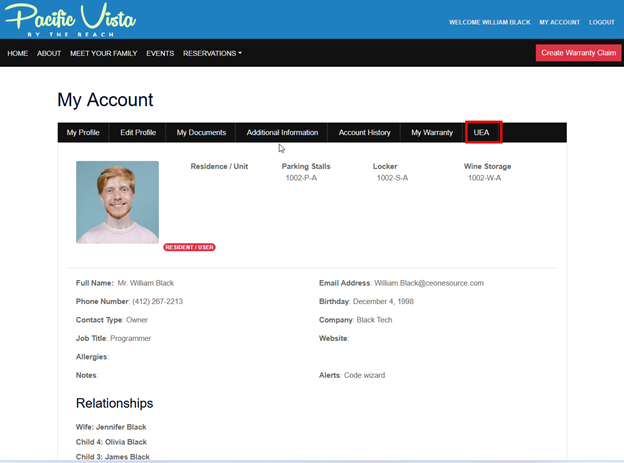
Select '**My Accoun**t' by clicking on it.
[](https://support.ceonesource.com/uploads/images/gallery/2025-11/K0olYKVzNuQXrIkG-image.png)
Click the '**Unit Entry Authorization**' button.
[](https://support.ceonesource.com/uploads/images/gallery/2025-11/tkDUbr7JKrBcKpnJ-image.png)
Fill in the required information, such as '**Unit**'.
[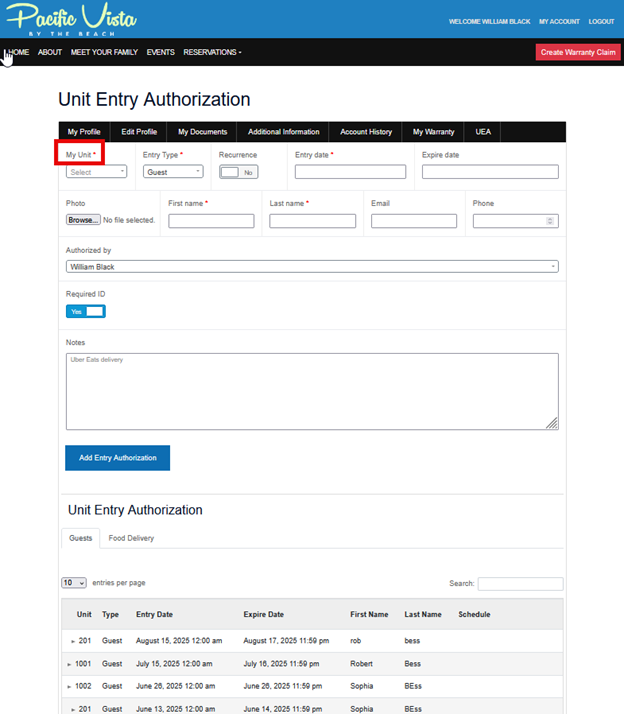](https://support.ceonesource.com/uploads/images/gallery/2025-11/dAHu2rPILLvk8aVo-image.png)
Choose if the authorization is to be made for **'Deliveries**' or for a '**Guest**.
[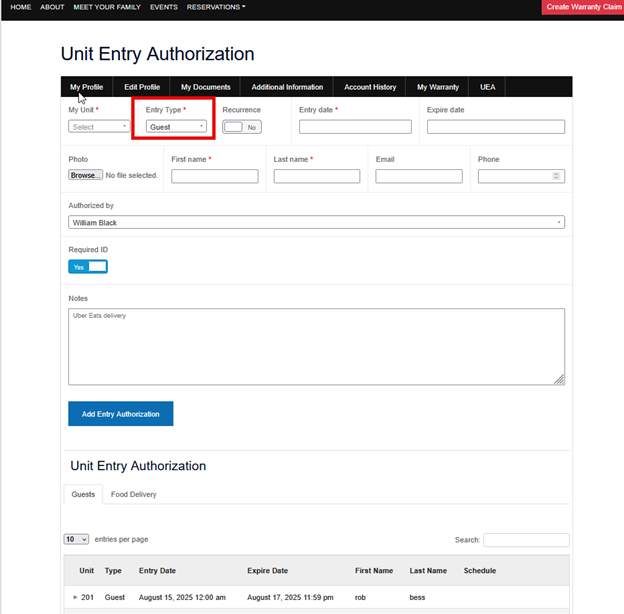](https://support.ceonesource.com/uploads/images/gallery/2025-11/TK5elEm6TZ9j3hKQ-image.png)
Select the correct or applicable '**Entry Date**'.
[](https://support.ceonesource.com/uploads/images/gallery/2025-11/frfEmFqMARsT8WSd-image.png)
Next, select the '**Expiry Date**'.
[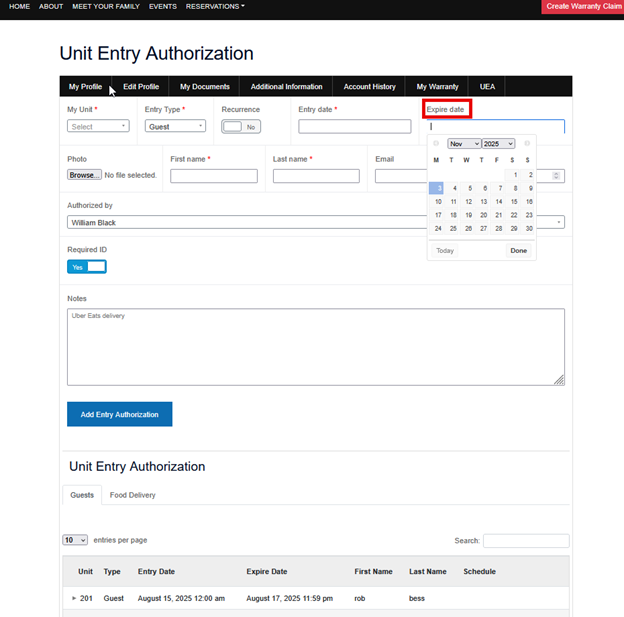](https://support.ceonesource.com/uploads/images/gallery/2025-11/ZRHHgSOY6ksxelOF-image.png)
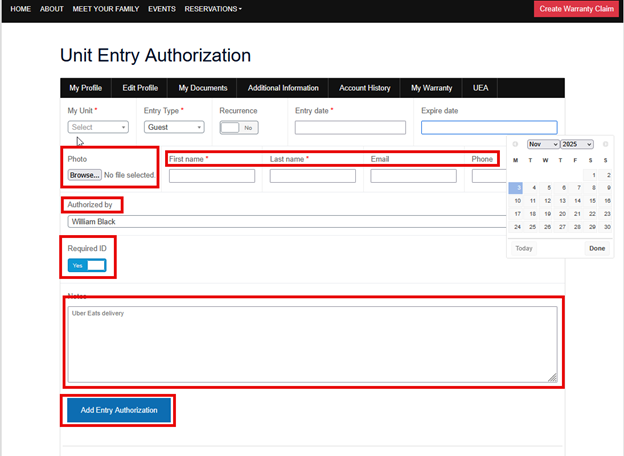
After completing the initial steps, you may attach a photograph by selecting the blue **‘Add Image’** button. Please ensure all mandatory fields—**‘First Name,’ ‘Last Name,’ ‘Email,’** and **‘Phone’**—are accurately completed. There is an option to require identification; simply enable this by toggling the **‘Require ID’** switch. Additionally, you may include any relevant instructions in the **‘Notes’** section. Finally, be sure to click **‘Add Unit Entry’** to save your submission.
**Please note:** Upon verification and registration as an authorized visitor, the guest will be issued a Card Key. This Card Key will remain active only for the dates specified in the authorization form and will be automatically deactivated following the expiration date.
[](https://support.ceonesource.com/uploads/images/gallery/2025-11/73irmY7pnJ2NKmpc-image.png)
# Parking Stalls
Please find attached the video for the **Parking Stalls**.
This section displays comprehensive information about all parking stalls, including their identifiers, locations, statuses, and assigned users (if applicable). It also includes a built-in feature that enables authorized personnel to register or add new parking stalls through a dedicated input form. This functionality helps maintain accurate parking data and supports efficient system management.
[](https://support.ceonesource.com/uploads/images/gallery/2025-11/TL5fE1Mpg2ipH9k1-image.png)
[](https://support.ceonesource.com/uploads/images/gallery/2025-11/tKaKPqTQFebxPahT-image.png)
# Lockers
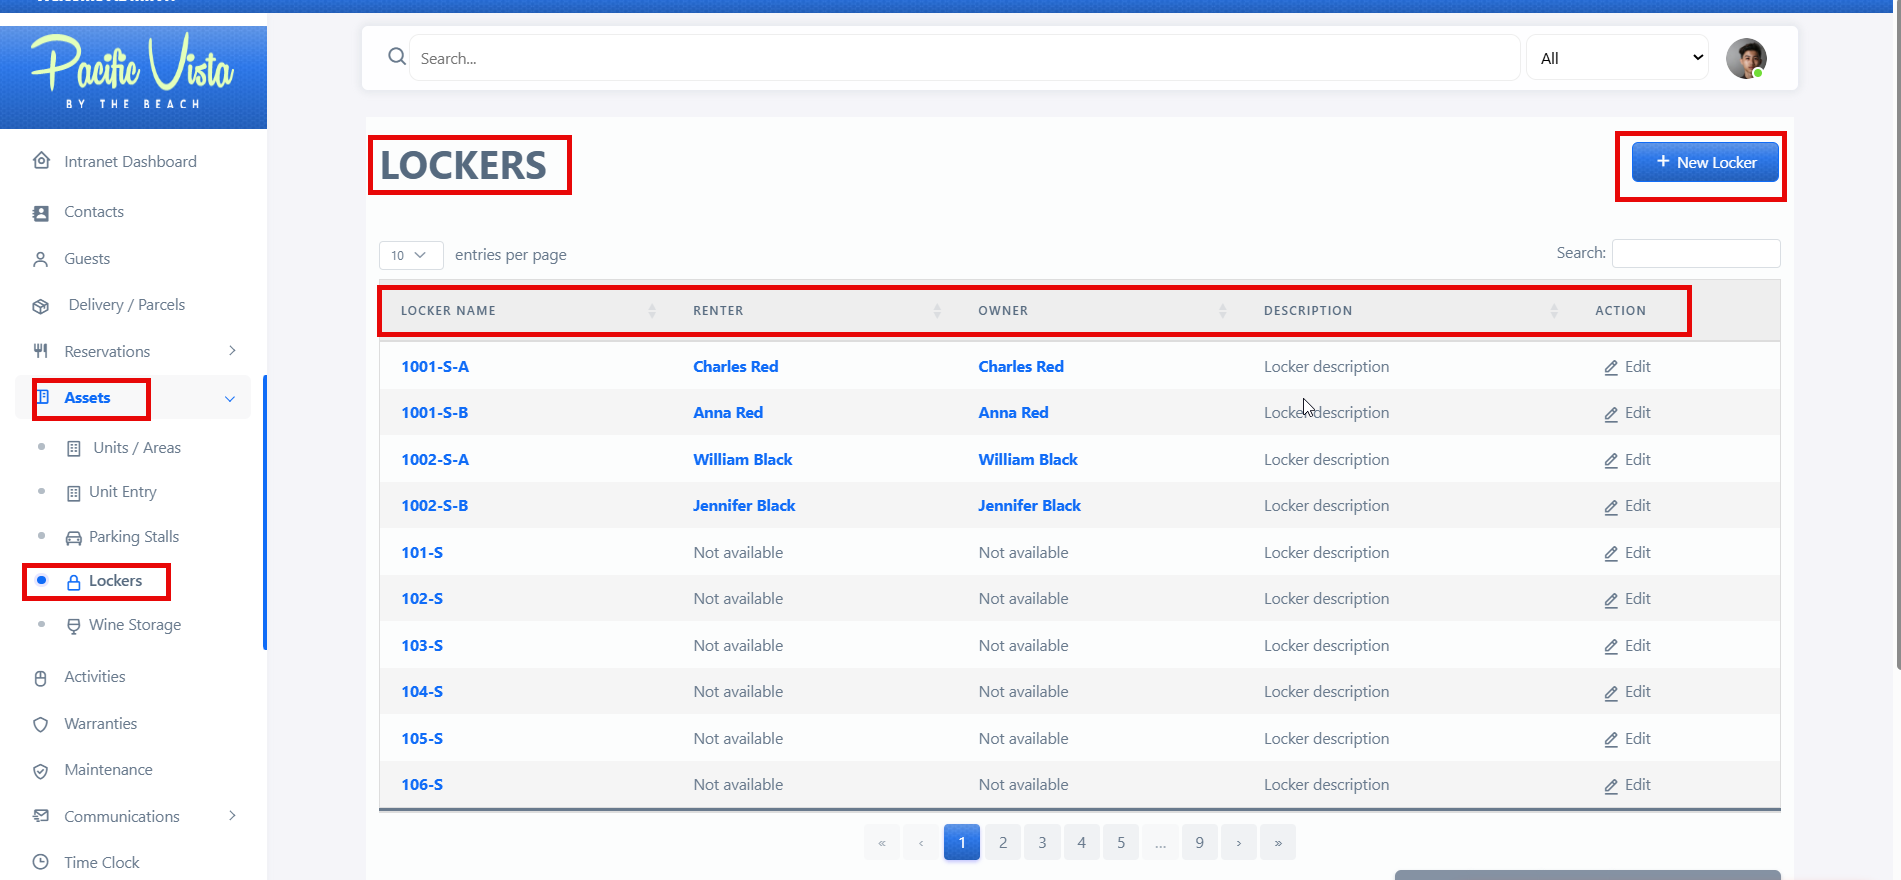
The **Lockers** section displays comprehensive details of all registered lockers, including the "**Locker Name"**, "**Renter"**, "**Owner"**, **Description**, and **Action** options. This feature allows administrators or authorized users to monitor and manage locker assignments efficiently.
Please find attached the video for the **Lockers**.
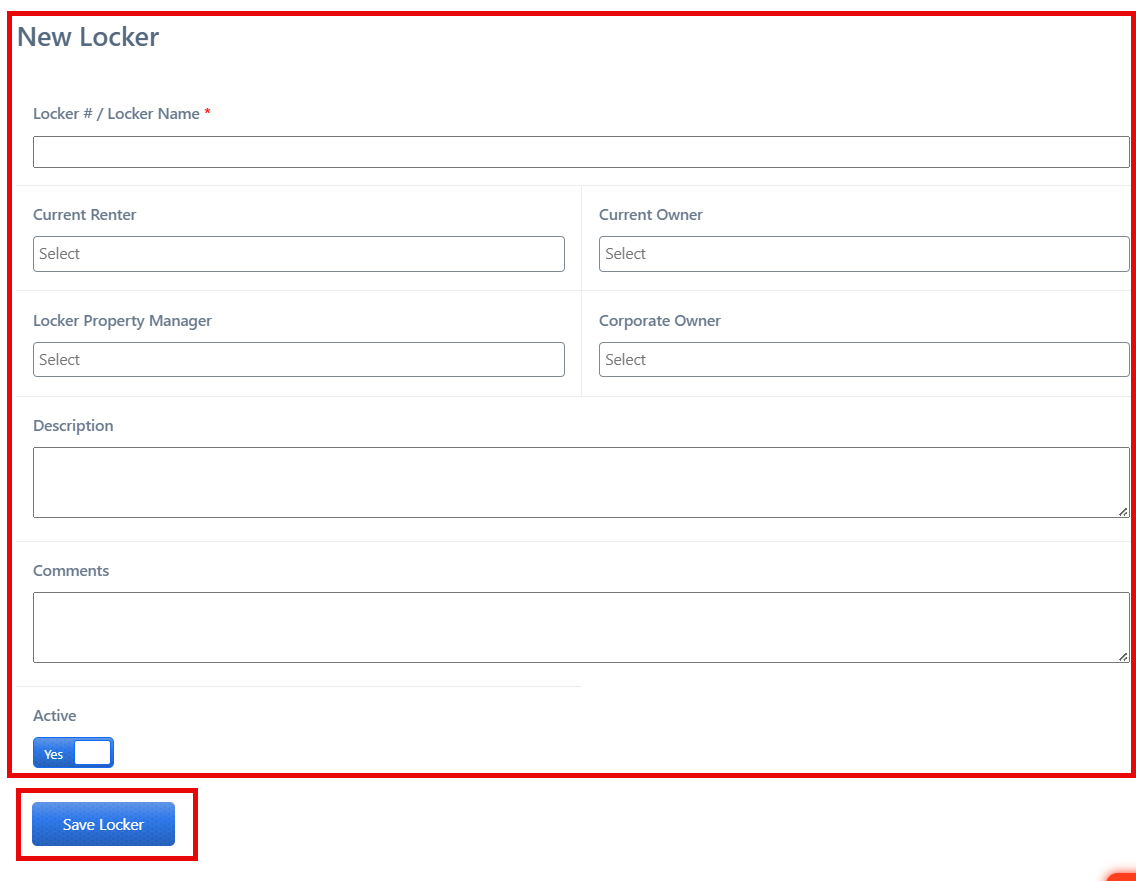
A **“New Locker”** button is also provided to add additional lockers. By selecting this option, users can input the required information and register new lockers in the system.
[](https://support.ceonesource.com/uploads/images/gallery/2025-11/skfCh1rmi9Udly1E-image.png)
After completing all required details, click **“Save Locker.”**
[](https://support.ceonesource.com/uploads/images/gallery/2025-11/wLZQatkXYVSCTp9v-image.png)
# Wine Storage
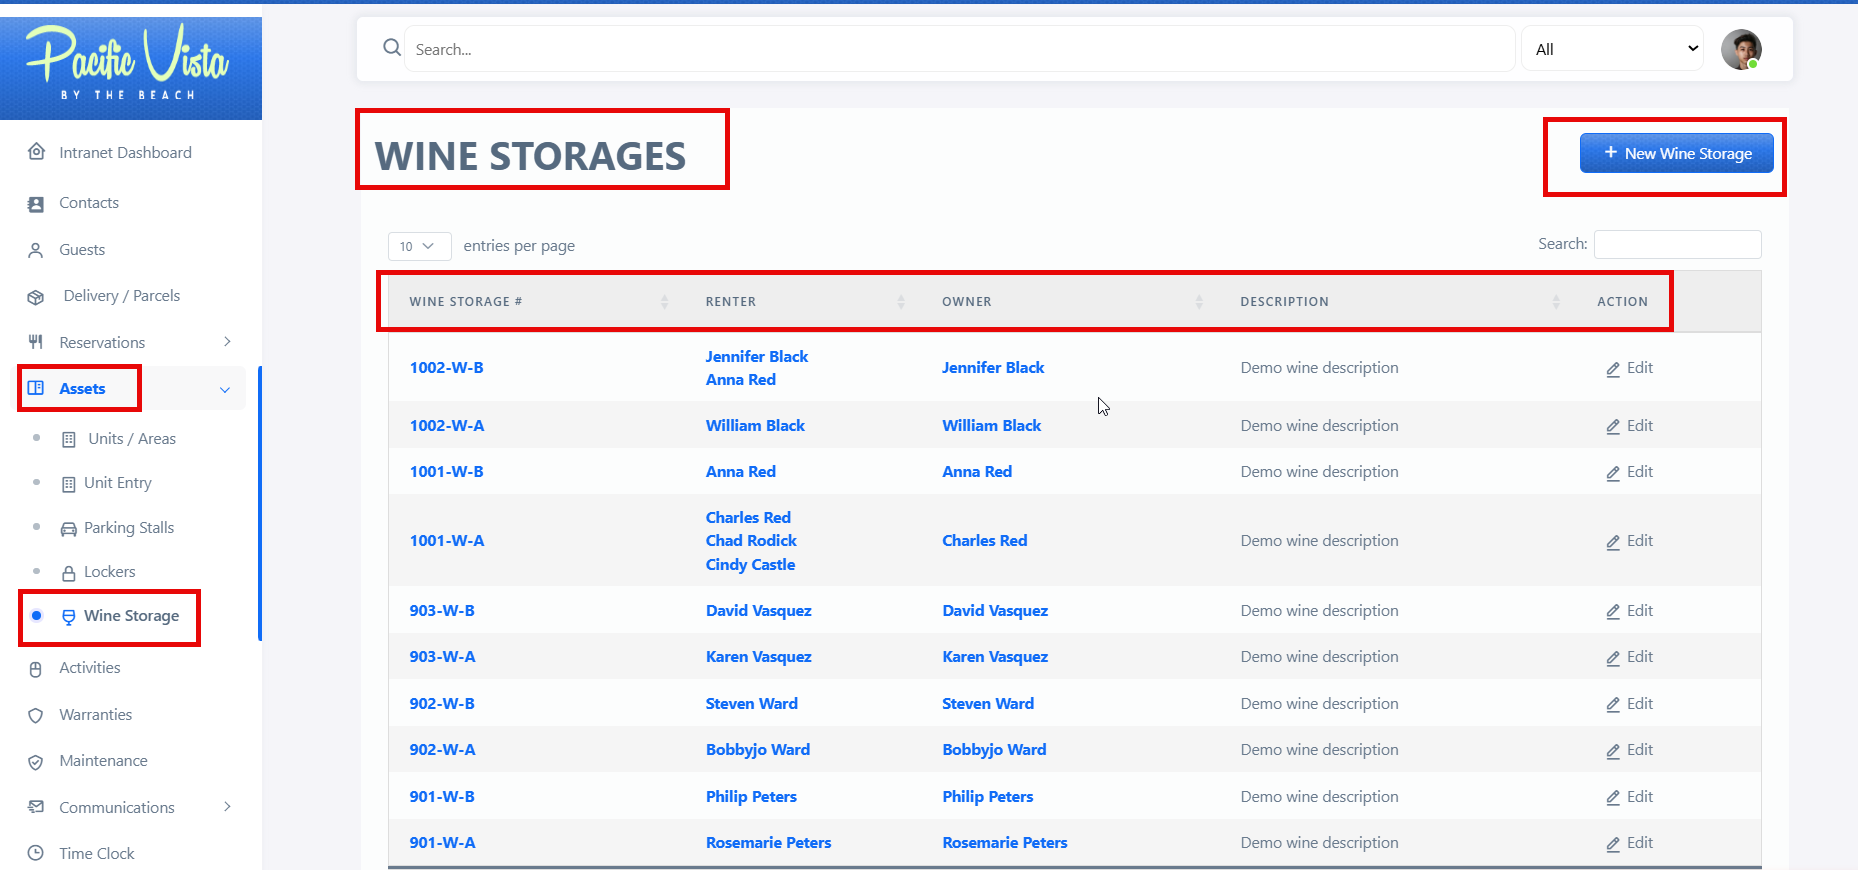
This section presents detailed information on each wine storage unit, including **Wine Storage Number**, **Renter**, **Owner**, **Description**, and available **Actions**. It serves as a centralized reference for managing and overseeing all wine storage assignments.
Please find attached the video for the **Wine Storage**.
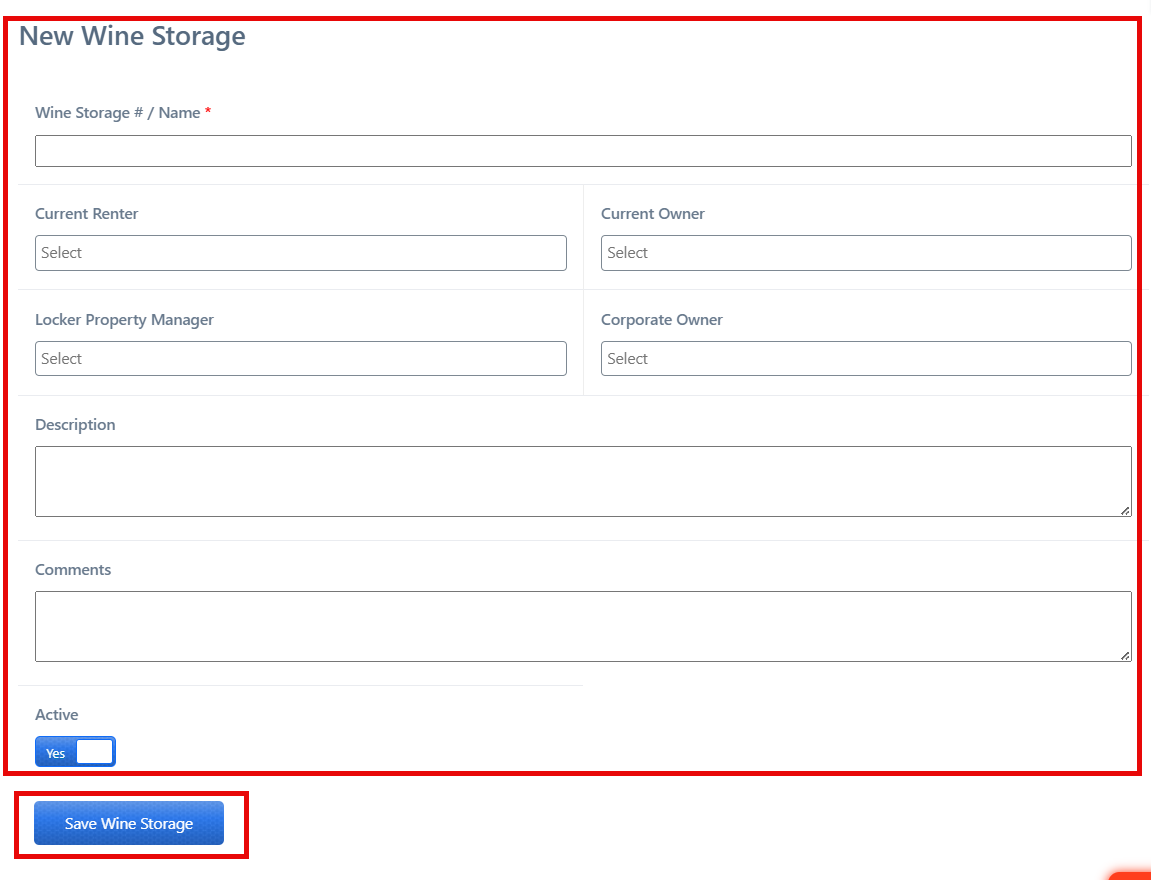
To add a new wine storage unit, select the **“New Wine Storage”** button and provide the required information to properly register and manage the unit.
[](https://support.ceonesource.com/uploads/images/gallery/2025-11/5rEjPeSOXBRLSoOb-image.png)
After completing all required details, click **“Save Wine Storage”**
[](https://support.ceonesource.com/uploads/images/gallery/2025-11/12UStgDnaOneJkGY-image.png)