Amenities
Overview
Amenities or Resources are the bookable items in the system. These may include cabanas, theater, service elevators, pools, gym, or any other resource that users can reserve.
Before bookings can be created, amenities must first be configured properly. A well-configured amenity ensures that users receive the correct notifications, administrators are informed of booking activity, and related activities are automatically created when needed.
Prerequisites
Activity Trigger and Activity Types:
Activity triggers automatically create activities based on selected activity types.
In the context of reservations, activity triggers can be used to automatically generate internal follow-up tasks or operational records when a booking event happens. Note also that the activity type has automatic triggers for emails.
Examples:
- Create a confirmation activity when a venue booking is submitted.
How activity triggers work
An activity trigger listens for a defined event or condition, then creates an activity using the configured activity type.
This helps automate internal processes and reduces the need for manual follow-up.
Recommendation
Before creating amenities, confirm that:
- The required activity types already exist
- The correct activity triggers are active
- The trigger logic matches your booking workflow
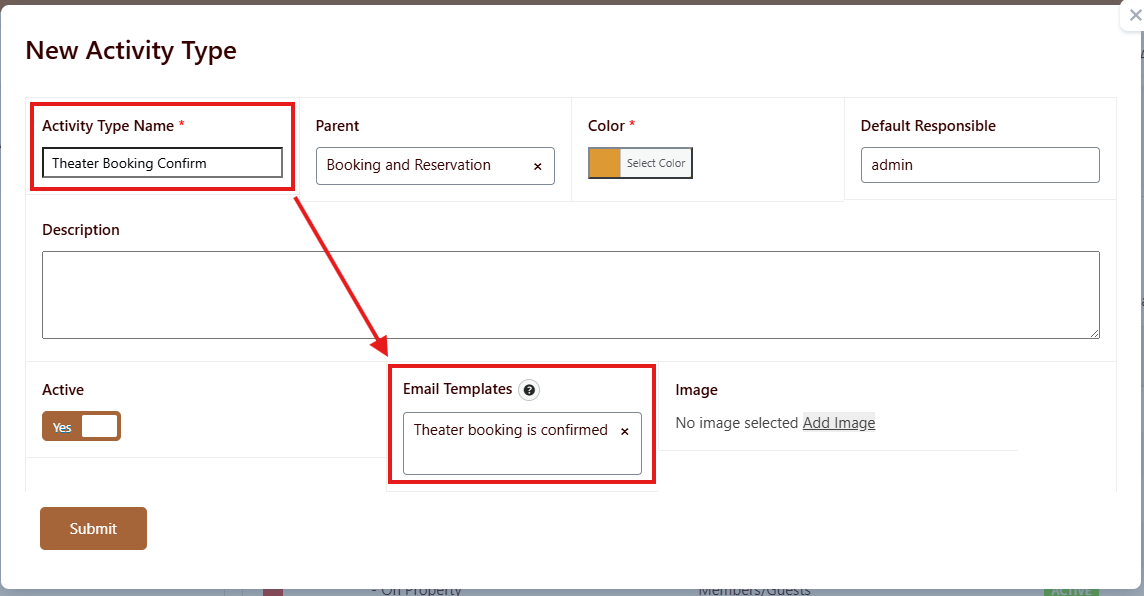
Note: You can create a Parent/Child relationship on the activity type.
Email Templates
Email templates are used to send automated notifications related to reservations.
Typical templates include:
- Visitor confirmation email – sent to the person requesting or creating the booking
- Administrator notification email – sent to admins or assigned staff when a booking is created, updated, approved, or cancelled
Depending on your workflow, you may also want to prepare templates for:
- Booking approval
- Booking rejection
- Booking reminder
- Booking cancellation
- Booking reschedule or update
Why email templates matter
Without the correct email templates, users and administrators may not receive important booking updates. This can lead to missed reservations, approval delays, or confusion about the booking status.
Best practice
Create and test all email templates before enabling the amenity for live use.
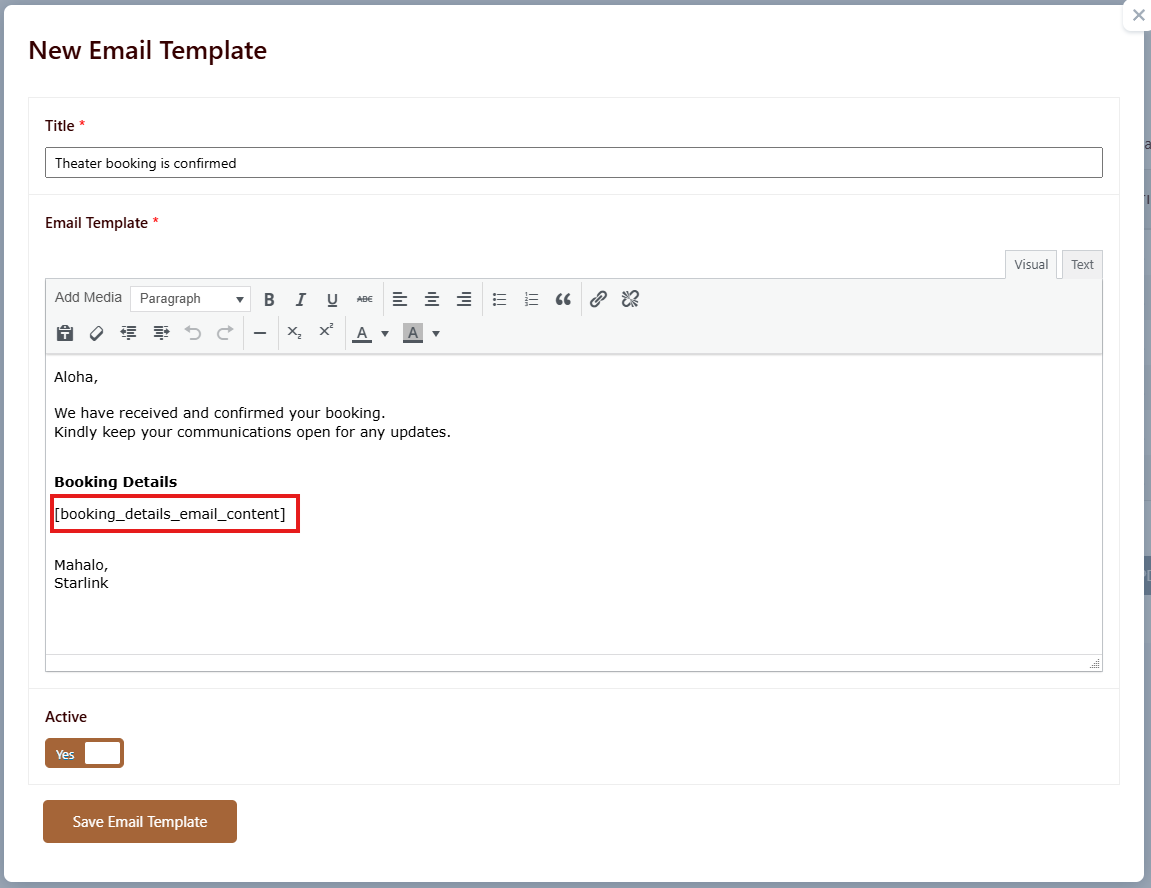
Note: Shortcode [booking_details_email_content] will return the reservation details. For example the name and amenity.
Create New Amenity
Follow these steps to create a new amenity or resource.
Step 1: Open the Amenities module
Step 2: Click +New Amenity
Select the option to create a new amenity record.
Step 3: Enter the basic information
Provide the required details for the amenity. Common fields may include:
Step 4: Configure booking-related settings
Step 5: Assign templates and triggers
Step 6: Save the amenity
Review the configuration, then save the record.
Amenity Settings
Amenity settings control how the resource behaves in the reservation system. These settings may vary depending on your implementation, but commonly include the following.
1. Amenity Title
The amenity name
2. Calendar Color (Hex) + Text Color
The background color and text color displayed in the calendar view.


3. Start and End Time
These define when the amenity is available to reserve.

4. Cleaning Buffer (Minutes)
Use for amenities that require buffers for cleaning.

5. Contact Booking Limit and Limit Period
Limits how many times a user can book within a set period. The settings below means that contacts can only book this amenity 3 times a week.

6. Maximum Expected People
Number of people the amenity can accommodate.

7. Allow Multiple Bookings At The Same Time
If an amenity allows multiple users to book together.

8. WaitList
Enable this to allow overlapping requests to be saved as a waitlist instead of being blocked.

9. Max Hours Per Booking
Set to 0 for no limit. Example: 4 means a booking can be at most 4 hours long.

10. Use Change Over Days
Enable overnight booking behavior. Requires check-in and check-out times.

11. Maximum Days Ahead To Book
For standard bookings, 0 means same-day only. For change over day bookings, 0 means next-day checkout only.
Example: if the start date is 04/05/2026 and the Maximum Days Ahead to Book is 7, then the max allowed end date is 04/12/2026.

12. Date Range Display
Optional. Limit the booking date picker to the next X days from today. Example: 180 means users can only select dates within the next 180 days.

13. Next Booking Availability ( Amenity Specific )
Optional. Add a recovery gap in days after each booking before this amenity can be booked again. Example: 7 means the next booking can only start 7 days after the current booking ends.

14. Default Comments

15. Activity Triggers
Create activities and triggers email notifications.

16. Admin Notification Email
Admin notification emails. Select from email templates.

17. Additional Fields
Add custom fields for each amenity. Additional fields are populated on the booking form.

This little icon is your helper 